
This post may contain affiliate links. Please read the disclosure for more info.
Jump To:
Project 1: Painting a Wooden Chair
 A wooden chair is a great beginner project. Start by removing any old paint or finish using a sanding block or orbital sander. Once the chair is smooth and ready, choose a high-quality paint that is appropriate for wood furniture. Apply the paint using a brush or roller and be sure to allow the paint to dry completely before adding a second coat. Once the second coat is dry, you can add a clear coat for added protection.
If you’re a beginner looking to start a DIY furniture refinishing project, painting a wooden chair is a great place to start. Here are the steps you need to follow to paint a wooden chair and give it a brand-new look:
- Start by sanding the chair: Use sandpaper to smooth out any rough or uneven spots on the chair. This will help the paint adhere to the surface better.
- Clean the chair: Use a clean cloth to wipe down the chair and remove any dust or debris from sanding.
- Prime the chair: Apply a coat of primer to the chair, which will help the paint adhere to the surface and give you a smoother finish.
- Let the primer dry: Follow the manufacturer’s instructions on drying time for the primer.
- Apply the first coat of paint: Using a brush or roller, apply the first coat of paint to the chair. Be sure to use long, even strokes and avoid drips.
- Let the paint dry: Allow the first coat of paint to dry completely before applying the second coat.
- Apply the second coat of paint: Once the first coat is completely dry, apply a second coat of paint to the chair.
- Let the paint dry again: Allow the second coat of paint to dry completely before using the chair.
- Add a protective topcoat: To ensure that your newly painted chair is protected and will last, apply a clear topcoat. Follow the manufacturer’s instructions for drying time.
- Enjoy your newly painted chair: Once the topcoat is dry, your newly painted chair is ready to use and enjoy!
Painting a wooden chair is a simple and affordable way to give it a brand-new look. With these easy steps, you can create a beautifully painted chair that will add a pop of color and style to any room in your home.
Project 2: Refinishing a Wooden Table
If you have a wooden table that is looking a bit worn, try refinishing it. Start by sanding the table down to remove any old finish or rough spots. Then, apply a wood stain to give the table a fresh new look. Be sure to follow the instructions on the stain can and apply it evenly with a brush or rag. Once the stain is dry, you can add a clear coat to protect the table.
Repainting a wooden table is a great way to give an old piece of furniture a fresh new look. Here are the steps you need to follow to repaint a wooden table:
Prepare the table: Remove any hardware or drawers from the table, and cover the surrounding area with newspaper or a drop cloth to protect it from paint splatters.
Sand the table: Use sandpaper to sand down the old paint or finish on the table. This will help the new paint adhere to the surface and give you a smoother finish.
Clean the table: Use a clean cloth to wipe down the table and remove any dust or debris from sanding.
Prime the table: Apply a coat of primer to the table, which will help the paint adhere to the surface and give you a smoother finish.
Let the primer dry: Follow the manufacturer’s instructions on drying time for the primer.
Apply the first coat of paint: Using a brush or roller, apply the first coat of paint to the table. Be sure to use long, even strokes and avoid drips.
Let the paint dry: Allow the first coat of paint to dry completely before applying the second coat.
Apply the second coat of paint: Once the first coat is completely dry, apply a second coat of paint to the table.
Let the paint dry again: Allow the second coat of paint to dry completely before using the table.
Add a protective topcoat: To ensure that your newly painted table is protected and will last, apply a clear topcoat. Follow the manufacturer’s instructions for drying time.
Repainting a wooden table is an easy and affordable way to give it a brand-new look. By following these easy steps, you can create a beautifully painted table that will add a pop of color and style to any room in your home.
Project 3: Updating a Dresser with New Hardware
If you have a dresser that needs a little sprucing up, try replacing the hardware. Choose new knobs or handles that fit with the style of the dresser and install them using a screwdriver. This project is simple, but it can make a big difference in the overall look of the piece.
Updating a dresser with new hardware is a quick and easy way to give an old piece of furniture a fresh new look. Here are the steps you need to follow to update a dresser with new hardware:
Choose your new hardware: There are many different styles and types of hardware available, so choose the one that best fits the style of your dresser and your personal taste.
Remove the old hardware: Use a screwdriver to remove the old hardware from your dresser. If the hardware is stuck or difficult to remove, try using a lubricant or gently tapping it with a hammer to loosen it.
Fill in any holes: If the new hardware requires different holes than the old hardware, you may need to fill in the old holes with wood filler. Allow the wood filler to dry completely before moving on to the next step.
Measure and mark: Measure and mark the location where you want to install the new hardware. Use a level to ensure that your hardware will be straight and even.
Install the new hardware: Use a screwdriver to install the new hardware onto your dresser. Make sure the hardware is tight and secure.
Add finishing touches: Once your new hardware is installed, take a step back and admire your handiwork. If desired, you can add additional embellishments or decorations to your dresser to complete the new look.
Updating a dresser with new hardware is a quick and easy project that can be completed in just a few hours. By following these easy steps, you can transform an old, outdated dresser into a stylish and modern piece of furniture that will add character and personality to any room in your home.
Project 4: Painting a Picture Frame
A picture frame is a small and simple project that is perfect for beginners. Start by sanding the frame down to remove any old paint or varnish. Then, paint the frame using a color that complements your decor. Be sure to use a high-quality paint that is appropriate for wood. Once the paint is dry, you can add a clear coat for added protection.
Painting a picture frame is a great DIY project for beginners. It’s a simple and affordable way to add a personal touch to any room in your home. Here are the steps you need to follow to paint a picture frame:
Gather your supplies: You’ll need a picture frame, sandpaper, primer, paint, and a paintbrush.
Sand the frame: Use sandpaper to lightly sand the frame to create a rough surface that the paint can adhere to.
Clean the frame: Use a clean cloth to wipe away any dust or debris from the frame.
Apply primer: Apply a coat of primer to the frame to help the paint adhere and provide an even finish. Allow the primer to dry completely before moving on to the next step.
Paint the frame: Once the primer has dried, apply your chosen paint color to the frame. Use long, even strokes and be sure to paint all edges and corners.
Allow the paint to dry: Let the paint dry completely before handling the frame or adding any additional coats.
Add a second coat (optional): If necessary, add a second coat of paint to the frame to achieve a more even and opaque finish. Allow the paint to dry completely.
Add finishing touches: Once your frame is dry, you can add any finishing touches or embellishments you desire, such as glitter, stickers, or stenciling.
Painting a picture frame is a simple and easy DIY project that can be completed in just a few hours. By following these easy steps, you can create a beautiful and personalized picture frame that will add a touch of color and style to any room in your home.
Project 5: Refinishing a Wooden Bench
A wooden bench can be a great addition to any room or outdoor space. Start by sanding the bench down to remove any old finish. Then, apply a coat of wood stain to give the bench a fresh new look. Be sure to choose a stain that is appropriate for outdoor use if you plan to use the bench outside.
Refinishing a bench is a great way to breathe new life into an old piece of furniture. It’s a simple and affordable DIY project that can be completed in just a few hours. Here are the steps you need to follow to refinish a bench:
Gather your supplies: You’ll need sandpaper, a sander (optional), wood stain, paintbrushes, and a clean cloth.
Sand the bench: Use sandpaper to remove any existing finish from the bench. If you have a lot of surface area to cover, you can use a sander to speed up the process.
Clean the bench: Use a clean cloth to wipe away any dust or debris from the bench.
Apply wood stain: Use a paintbrush to apply the wood stain to the bench, being sure to cover all surfaces evenly. Allow the stain to soak into the wood for the recommended time, then wipe away any excess with a clean cloth.
Allow the stain to dry: Let the stain dry completely before moving on to the next step.
Add additional coats (optional): If necessary, add additional coats of stain until you achieve the desired color.
Add a protective coat: Apply a protective coat, such as polyurethane, to the bench to protect the wood and give it a glossy finish.
Allow the protective coat to dry: Allow the protective coat to dry completely before using the bench.
Refinishing a bench is an easy and affordable way to give an old piece of furniture new life. By following these simple steps, you can create a beautiful and functional piece that will add character and style to any room in your home.
Project 6: Restoring an Antique Trunk
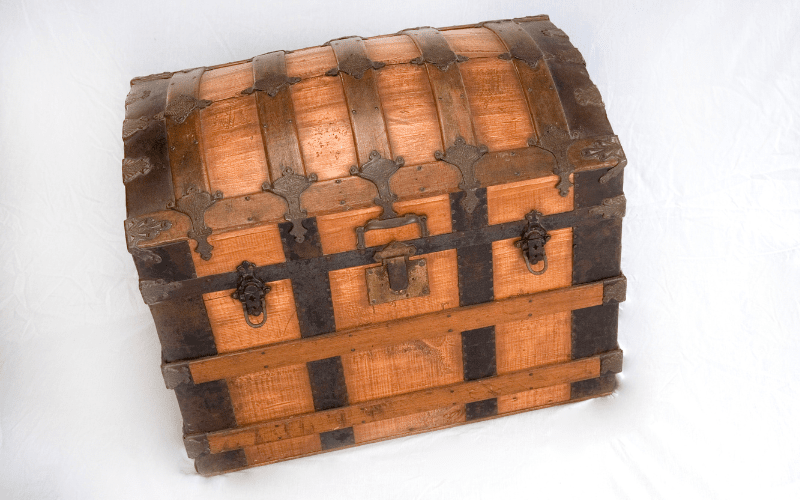
If you have an antique trunk that needs a little TLC, try restoring it. Start by cleaning the trunk with a gentle soap and water solution. Then, repair any broken or damaged parts using wood glue. Finally, apply a coat of wax to protect the trunk. This project requires a bit more patience and skill, but the end result is well worth the effort.
Restoring an antique trunk can be a rewarding and satisfying DIY project for beginners. It can bring an old piece of furniture back to life and give it a new purpose. Here are the steps you need to follow to restore an antique trunk:
Clean the trunk: Use a soft brush to remove any dust or debris from the trunk. You can also use a vacuum cleaner to remove any loose debris.
Remove the hardware: Use a screwdriver to remove any hardware from the trunk, such as handles, locks, and hinges.
Sand the trunk: Use sandpaper to remove any existing finish or paint from the trunk. If the trunk is very old, you may want to use a sander to speed up the process.
Clean the trunk again: Use a clean cloth to wipe away any dust or debris from the trunk.
Repair any damage: If there are any holes or cracks in the trunk, you can use wood filler to fill them in. Once the wood filler has dried, sand it down to create a smooth surface.
Apply wood stain or paint: Apply wood stain or paint to the trunk, being sure to cover all surfaces evenly. Allow the stain or paint to dry completely before moving on to the next step.
Add a protective coat: Apply a protective coat, such as polyurethane, to the trunk to protect the wood and give it a glossy finish.
Reattach the hardware: Once the protective coat has dried, reattach the hardware to the trunk.
Restoring an antique trunk can be a fun and rewarding project for beginners. By following these simple steps, you can bring new life to an old piece of furniture and create a beautiful and functional piece that will add character and style to any room in your home.
Project 7: Painting a Nightstand
A nightstand is another easy project for beginners. Start by sanding the nightstand down to remove any old paint or finish. Then, paint the nightstand using a color that matches your decor. Be sure to use a high-quality paint that is appropriate for wood. Once the paint is dry, you can add a clear coat for added protection.
A nightstand is a great piece of furniture to start your DIY refinishing journey. It is small, easy to handle, and doesn’t require a lot of materials or time. With just a few simple steps, you can transform an old and outdated nightstand into a beautiful and modern piece that fits your style and personality.
Materials needed:
- Sandpaper (120 and 220 grit)
- Tack cloth
- Primer
- Paint
- Paintbrushes
- Painter’s tape
Step 1: Prepare the Nightstand
Before painting your nightstand, you need to prepare it first. Remove any hardware like handles or knobs and set them aside. Use sandpaper to smooth any rough spots or scratches on the nightstand. Start with 120 grit sandpaper to remove any old finish or stain, and then finish with 220 grit sandpaper for a smooth surface. After sanding, wipe the nightstand with a tack cloth to remove any dust or debris.
Step 2: Prime the Nightstand
Once the nightstand is prepared, apply a coat of primer to help the paint adhere to the surface. Use a paintbrush to apply the primer in smooth, even strokes, following the grain of the wood. Let the primer dry completely before moving on to the next step.
Step 3: Paint the Nightstand
After the primer is dry, it’s time to paint the nightstand. Choose a color that matches your room’s decor and personality. Use a paintbrush to apply the paint in smooth, even strokes, following the grain of the wood. Let the first coat dry completely before applying a second coat. If needed, apply a third coat for a more even finish.
Step 4: Add New Hardware
Once the paint is dry, it’s time to add new hardware. You can either reuse the old hardware or purchase new ones that match the new look of your nightstand. Use painter’s tape to mark where the new hardware will go, and then attach them with screws.
Step 5: Finishing Touches
After you’ve added the new hardware, inspect the nightstand for any missed spots or uneven paint. Touch up as necessary, and then let the nightstand dry completely. You can add a coat of clear sealer to protect the paint and give it a shiny finish.
In conclusion, painting a nightstand is a quick and easy DIY furniture refinishing project that can make a big impact in your room’s decor. With just a few materials and steps, you can transform an old and outdated nightstand into a beautiful and modern piece that you’ll love.
Project 8: Refinishing a Wooden Picture Frame
A wooden picture frame is another great project for beginners. Start by sanding the frame down to remove any old finish. Then, apply a coat of wood stain to give the frame a fresh new look. Be sure to choose a stain that complements the color of the picture you plan.
Repainting a wooden picture frame is an easy DIY furniture refinishing project that can breathe new life into an old, outdated or damaged frame. With just a few supplies and some simple steps, you can give your picture frame a fresh new look that will make it look like new again. Here’s how:
Gather Supplies: To start, gather all the necessary supplies. You’ll need a wooden picture frame, sandpaper (fine and medium grit), primer, paint, paintbrushes, and a clean, dry cloth.
Remove Any Old Paint: Use the sandpaper to remove any old paint, dirt or other debris from the surface of the frame. Start with the medium grit sandpaper to remove any major imperfections, and then switch to the fine grit sandpaper to smooth out the surface.
Apply Primer: Once the frame is clean and dry, apply a thin coat of primer to the surface. The primer will help the paint adhere better to the frame and create a smooth, even finish. Allow the primer to dry completely before moving on to the next step.
Apply Paint: Choose a paint color that complements the picture you’ll be framing. Using a paintbrush, apply a thin, even coat of paint to the entire surface of the frame. Allow the paint to dry completely, and then apply a second coat if necessary.
Touch Up Any Imperfections: Once the paint is dry, inspect the frame for any imperfections or areas that may need touch-up. Use a fine brush to fix any flaws in the paint.
Let the Frame Dry: After touching up any imperfections, allow the frame to dry completely before placing any artwork inside. Repainting a wooden picture frame is an easy DIY project that can be completed in just a few hours. By following these simple steps, you can give new life to an old frame and create a beautiful piece of art that you’ll be proud to display in your home.
Project 9: Paint a wooden stool
A wooden stool is another simple project that is perfect for beginners. Start by sanding the stool down to remove any old paint or finish. Then, paint the stool using a high-quality paint that is appropriate for wood furniture.
If you’re new to DIY furniture refinishing, starting with a simple project like painting a wooden stool is a great way to gain experience and confidence. With a few basic tools and supplies, you can transform a tired old stool into a fresh and stylish piece of furniture. Follow these steps to paint a wooden stool and add a new flair to your home decor.
Materials:
- Wooden stool
- Sandpaper (medium grit)
- Tack cloth
- Primer
- Paint
- Paintbrush or paint sprayer
Steps:
Start by sanding the wooden stool with medium grit sandpaper. This will help to remove any rough spots or imperfections on the surface of the stool, as well as provide some texture for the primer to adhere to. Use a tack cloth to wipe away any dust or debris.
Apply a coat of primer to the stool. This will help the paint to adhere to the wood and ensure a smooth, even finish. Allow the primer to dry completely before moving on to the next step.
Choose your paint color and apply the first coat using a paintbrush or paint sprayer. It’s usually best to apply two or three thin coats of paint rather than one thick coat, as this will help to prevent drips and ensure an even finish. Be sure to allow each coat to dry completely before applying the next.
Once the final coat of paint has dried completely, you can add some additional decorative touches if desired. For example, you could add some stenciled designs, use a different color for the legs or base of the stool, or add a layer of clear coat or wax for added protection and shine.
With just a few basic tools and some creativity, you can easily paint a wooden stool and create a beautiful and functional piece of furniture for your home. Whether you choose a bold and bright color or a more subtle shade, this simple project is a great way to get started with DIY furniture refinishing and add some personality to your home decor.
Project 10: Repurpose an old piece of furniture:
If you have an old piece of furniture that is no longer being used, try repurposing it. For example, you could turn an old dresser into a bookshelf, or use an old coffee table as a bench.
Repurposing an old piece of furniture is an excellent way to give it a new lease of life and add a unique touch to your home decor. This project is perfect for beginners who want to learn how to upcycle and get creative with their furniture. Here are some easy steps to repurpose an old piece of furniture:
Choose your piece of furniture: Look for an old piece of furniture that you no longer need or find at a thrift store or garage sale. It can be a dresser, a bookshelf, or any other piece of furniture that you can imagine repurposing.
Clean the furniture: Before you start repurposing, it’s important to clean the furniture thoroughly. Use a damp cloth to wipe off any dust or dirt, and let it dry completely.
Sand the furniture: Sanding the furniture will remove any old paint or varnish and create a smooth surface for you to work with. Use sandpaper with a grit between 120-220 and sand in the direction of the wood grain. Be sure to wear a mask and goggles to protect yourself from dust and debris.
Prime the furniture: Applying a primer will help the paint adhere to the furniture and create a smooth, even finish. Use a paintbrush or roller to apply the primer evenly over the entire surface of the furniture. Allow it to dry completely before moving on to the next step.
Paint the furniture: Now it’s time to get creative with the paint. Choose a color that complements your home decor and apply it evenly over the entire surface of the furniture. Be sure to let each coat dry completely before applying the next coat. You may need to apply multiple coats depending on the coverage you desire.
Add finishing touches: Once the paint has dried completely, you can add some finishing touches to your repurposed furniture. You can use stencils to add a design, add some decorative knobs or pulls, or use a clear coat to protect the paint.
Repurposing old furniture is a fun and easy way to give it a new life and add a unique touch to your home decor. With these easy steps, you can transform an old piece of furniture into a beautiful and functional piece that you can be proud of.
Conclusion:
In conclusion, refinishing furniture is an easy and cost-effective way to breathe new life into your home décor. These 10 easy DIY furniture refinishing projects for beginners are a great starting point for anyone looking to try their hand at furniture restoration. With the right tools, materials, and a bit of patience, you can transform old and worn furniture into stylish and unique pieces that reflect your personal style. Remember to take the time to properly prep and protect your furniture, and don’t be afraid to experiment with colors, patterns, and textures. Whether you’re updating an old dresser, painting a wooden stool, or repurposing an old piece of furniture, these projects are sure to inspire your creativity and leave you with beautiful, one-of-a-kind pieces for your home. So why not give it a try and start your furniture refinishing journey today!
Find related content here:
- 10 Easy DIY Furniture Refinishing Projects for Beginners: A Comprehensive Guide to Reviving Your Old Furniture
- 20 Home Remodeling Ideas and Tips for Affordable and Functional Upgrades: A Comprehensive Guide to DIY Home Renovation and Choosing the Right Contractor
- Top 25 Home Safety Tips Every Homeowner Must Know
- How to maintain a home’s HVAC system?
- 10 Foolproof Exterior Home Maintenance Tips