This post may contain affiliate links. Please read the disclosure for more info.
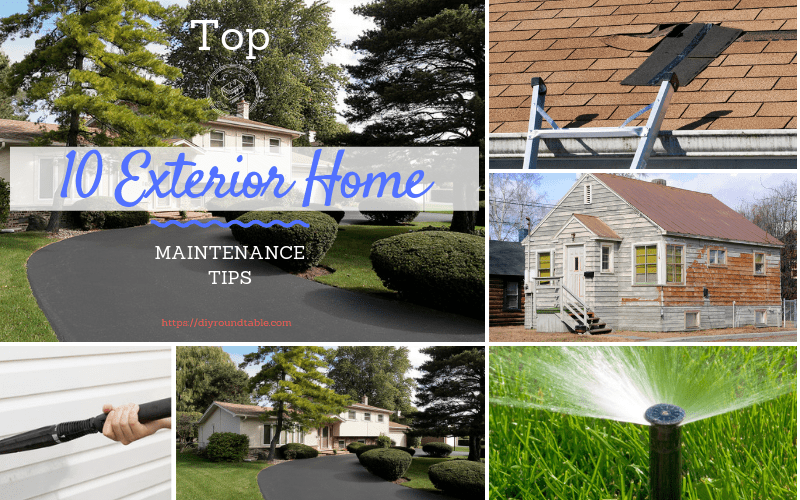
I focus most of my time on the interior or my home from kitchen or bath remodels, to painting, or fixing lights, outlets, or adding smart home devices. Living in the northeast means from Dec till April we live inside but when the weather gets warm its time to get out and start cleaning up for the warmer months which means focusing on the exterior of my home. I find myself doing lawn maintenance, checking the driveway, walkways, sidewalks or gutters for issues and cleaning up the siding, fencing, and exterior. Read below on the 10 foolproof exterior home maintenance tips you can do right now to ensure your home looks beautiful while preventing costly repairs later.
Jump To:
1. Know Your Property Lines:
- Knowing your property lines as a homeowner is critical to avoid fines, angry neighbors and financial impacts.
- Many cities require you to have a setback from any property line before you can build many structures and an inspector can fail you for not adhering to those setbacks.
- It is best to first start by getting a plot outline from city hall.
- Once you know the lot layout you can look for the stakes visually, by digging around with a small shovel or rake or use a metal detector for a technology solution.
- You can use marking sticks or marking spray-paint to ensure you have a visual reminder of the property line location before laying out your project.
2. How To Maintain Your Sidewalks?
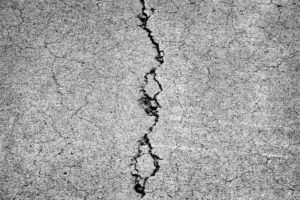
- While the local laws vary, it is a good idea to reduce any likelihood of someone falling on or near your property by ensuring your sidewalks are free from cracks, roots, or other tripping hazards. While most sidewalks are public property, the maintenance and repair of the sidewalk is generally the responsibility of the homeowner.
- While it is probably easier to get sued for a car accident than a slip and fall on your sidewalk or property, it is best to maintain your sidewalks to avoid any possible issues.
- If you have cracks in the sidewalk, you can use many concrete repair solutions at a big box store, but a go-to is DAP Self-Leveling Concrete (amazon link). It has worked wonders!
- If you have roots growing out from your sidewalk, you need to be cautious and not just start cutting them away. Some trees can die if you cut their roots. If the crack is troublesome, you can use cement to help smooth out the tripping hazard, but if the damage is much worse, the tree may need to be removed. If it’s on your property line, you should be fine, but if it’s near the street, you may need approval from the town before having it removed.
- The objective is to reduce tripping hazards as much as possible. If the damage is too much to repair, you may want to call in a professional to replace the slab or section of concrete. In many cases, the entire sidewalk would not need to be replaced and only repair the part that is a tripping hazard.
3. How To Maintain A Home’s Gutters?
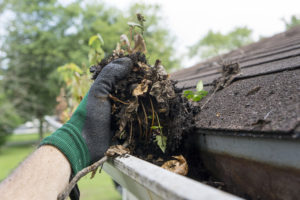
• Gutters are vital to a home. Gutters help remove water away from your home and help reduce wear and tear on your home.
• If gutters are clogged, usually from leaves, acorns or other debris, it is possible to have an ice dam in the winter or for the water to back up and find a way to enter your home near your eaves, roof, or another area.
• With clogged gutters, you may also find an animal has made a home in them.
• Neglecting the gutters on your home is asking for trouble and not to mention the weight of the clogged gutter could cause it to pull away from your home.
• You should clean your gutters at least twice per year.
• You need a ladder that can safely reach your gutters.
• You can climb the ladder with a garbage bag and while wearing safety gloves, scoop out the debris in the gutter and deposit it in the garbage bag.
• After you removed the leaves and other debris, you can carry up a water hose to help flush out any remaining waste.
• You will also need to ensure the downspout and any further drain lines are clear of debris as well.
• For this, you can use a plumber’s snake and use it much like you would for cleaning a drain in your home. See more information on using a snake in the article: What Every Homeowner Must Know: Home Plumbing Basics
4. How Long Should You Run Lawn Sprinklers?
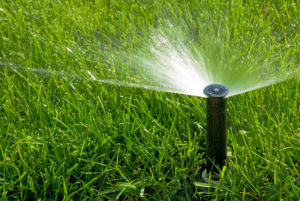
• Nowadays lawn sprinklers are smarter, have remote-enabled technology capabilities, use less water and save money than a traditional hose and sprinkler.
• While many systems vary, they perform the same set of functions. You program it to run for specific days, for certain times and certain durations. Many sprinkler systems can avoid operating on days it is raining. You can even set up the system on zones to not affect water pressure and to ensure each area gets the adequate water it needs.
• Run the lawn sprinkler long enough to provide the lawn with a half inch of water. You can determine how long your sprinkler system needs to achieve this by placing a tuna can in the yard. Run the sprinkler and time how long it took to get half an inch of water in the tun can. You can then apply this time to your sprinkler system.
5. How To Winterize Lawn Sprinklers?
• When the temperatures get low (near 35 degrees consistently) you will need to winterize your lawn sprinklers if you live in colder regions so you can avoid costly issues when spring arrives.
• To winterize your sprinkler you want to use a blowout method, which means you will purge the water out of the lines, so they do not freeze and crack when in the winter.
• Using a blowout method requires shutting off the water, attaching an air compressor to your water line and using your sprinkler system to run each zone to blow out the water in the pipes.
• Once the program has run each zone, you want to start it over and do it a second time to ensure you have all the water blown out.
• While running the compressor and sprinkler system each zone will pop up, and water will be forced out until it mists. Once the mist stops you want to go to the next sprinkler zone to avoid damaging the pipe or sprinkler head.
• Note: While a home compressor can generate the required (approx.) 60 psi you may find it will not generate enough volume of air. If so, you may want to call in a professional to winterize your system. This cost approx. $125. Always wear safety glasses!
6. How To Maintain A Lawn?
• Always ensure the grade of your landscaping is helping water move away from your home. The proper grading means the dirt close to your home is higher than the dirt further away from your home allowing water to run down the grading.
• Be sure to follow the watering guidelines above.
• Use fertilizer in spring and late summer.
• Mow your lawn regularly when the grass is not wet.
• Do not mow the grass too short. Keep your mower setting to 3 or 4 inches high to allow the grass to have deeper roots and avoid downstream lawn problems.
• Fertilizer in autumn can help the lawn survive in winter and thrive in the spring.
• Remove weeds regularly.
7. How To Maintain An Asphalt Driveway?

- Most homes have asphalt driveways that can last up to 30 years if properly cared for. Proper maintenance includes filling in cracks, applying a sealer, cutaway any tree or shrub roots, plow it carefully (for those in the colder climates), and clean up stains like oil, gasoline or paint.
- If you get cracks in the asphalt you can use a chisel to remove loose asphalt material and clean out all debris in the crack. Apply an asphalt crack filler and allow it to dry. Then move onto sealing the driveway.
- Sealing a driveway can increase the longevity and look of your driveway for years to come while saving you thousands in the long run.
- To seal your driveway, follow the prior steps to ensure it is clean of debris, stains and all cracks are properly repaired.
- Here are 5 pre-requisites to be aware of before starting to seal your asphalt driveway:
- Follow prior steps above to ensure the driveway is ready to receive a sealant
- Temp must be a min 60 degrees F before and after
- Do not apply if rain is coming in 48 hours
- Avoid using driveway for 48 hours
- Can take 6 months to fully cure
- Here are 7 the steps to sealing your asphalt driveway:
- Tape off what shouldn’t be sealed
- Stir the sealer
- Do the edges with a brush first to give a neater edge
- Pour the bucket of sealer from one edge to the other working toward the street in six-inch bands
- Use a squeegee to spread the sealer and move fast enough to prevent it from drying quickly
- Don’t stop once starting – you need to finish it when started
- Allow 48 hours to dry and up to 6 months to fully cure
8. How To Maintain Your Home’s Roof?

What You Should Know About Your Home’s Roof
- Most homeowners don’t realize there is a problem with their roof until water has entered their home.
- As a homeowner, you should occasionally inspect your roof, at first from the street (use binoculars if you need to) to see if shingles are missing or out of place.
- If there are missing or damaged shingles, you must make a repair or call a company if you are like me and hate heights!
- My tip, since I hate heights, means I will wait for heavy rain, go up in the attic and see if any water is coming in. This allows me to avoid going up on the roof for any visual inspection.
- This tip allows you to avoid assuming the issue with the roof is directly above where the water is present in the home. Water tends to travel with the direction of gravity, the rafters, slope and other means with the least resistance to find its end.
- Your home’s roof needs to breathe!
- Roof ventilation is a huge issue and one I speak to colleagues and friends about a lot.
- Most people want to cover up any cracks, holes, pack in the insulation and reduce any outside air mixing with the attic air.
- This is a huge mistake since the proper ventilation of your roof will prolong the longevity while ensuring the space inside the attic stays as healthy as possible.
- Check out the article on why ventilation is so important found here: Why is ventilation important?
How To Repair A Home’s Roof?
- Most DIY homeowners can repair their own roof, but keep in mind that several safety precautions and your own capabilities need to be taken into consideration.
- I for one am not recommending it and I do not like heights. I will leave the roof to the professionals and look at them with amazement as they walk upright 15 feet in the air!
- If you decide to repair your own roof be sure to be safe! Consider using a roof safety harness just in case!
- If you need to replace a damaged roof shingle, follow the next steps to ensure it is done properly!
- You will need a crowbar or prybar, nails, hammer, ladder, roofing felt paper, roofing cement, putty knife, and new shingles.
- First, you need to remove the existing shingle if it is still in place by using a prybar or crowbar to remove the remaining nails.
- Once the shingle is removed you can inspect the existing underlayment and material for any defects. If you see issues you can use roofing cement to seal the hole or gap to avoid issues later.
- Replace the empty space with a new shingle by lifting existing shingles and sliding the new shingle into place.
- Use the hammer and nails to secure the shingle to the roof spacing the new nails about every four inches.
- If you must work around vent stacks, chimneys or other objects you want to ensure that your new shingles are under those objects and be sure to seal the areas with roofing cement.
- Don’t forget to inspect the flashing, metal joints between the roof and vents, skylights or chimney, for any damage.
9. How To Clean Vinyl Fencing?
If you are like me and have a white vinyl fence, you are probably used to seeing grass, mud or other stains easily accumulate on it. You probably also tried harsh chemicals that you find at certain stores with most of them hurting your eyes or your skin. Personally, I avoid them. I have something better and safer!
- I mix warm water, about a ½ gallon, with about ½ – 1 cup white vinegar. That is all the cleaning power you need.
- I mix the vinegar and water and put it in a spray bottle.
- Spray the fence in small sections at a time.
- Let the spray sit for few mins.
- Rinse the fence with a garden hose or power washer.
- If you have not cleaned the fence in a long time you may need a stronger mixture of water and vinegar ratio. Be sure it sits longer than a few mins.
- I also find for stubborn grass stains to use a sponge and scrub some areas to help get it clean.
10. Twelve Things Every Homeowner Should Know About Vinyl Siding?

- There are many siding options nowadays based on height, material, design, color and more.
- Siding and vinyl siding specifically is the protective layer outside of your home that not only protects your home from elements but also makes it look nice.
- There are so many materials to choose from for siding and the pro’s for various materials depends on where you live, the natural elements, color palette requirements, mother nature, etc.. regardless, vinyl siding is always a good choice.
- Most homeowners will not have to face many issues with their siding unless it doesn’t align with their design, color palette, style or remodel to the interior which will result in exterior repairs.
- Vinyl siding like windows comes in so many designs, styles and color choices.
- Vinyl siding will last a long time and retain its look with low maintenance.
- Installing, replacing and repairing vinyl siding is a great DIY task for many homeowners.
- Get to know the terms with vinyl siding like:
- Corner trim – There are two types; interior and exterior. This trim allows the siding to sit into the vertical pieces and keep the weather out.
- J-channel – Used at window and door openings to protect and hide any edges while helping to shed moisture.
- Zip tool – Great tool used for removing or locking in edges of the siding. Its cost effective and will help the process go smoother while avoiding any injuries.
- Before installing, replacing or repairing any siding make sure the surface behind it is free from insects, moisture and prepared to receive the new siding.
- Siding is installed in lock-together pieces that expand and contract with the elements and rely on trim pieces to cover joints and give the project a finished look.
- Make sure the current or repaired vinyl siding nails are not too tight. Vinyl siding is designed to allow water to drain behind it. If nails are hammered too tight it will reduce the sidings ability to shed water resulting in moisture issues that can lead to bigger issues.
- If your exterior trim and siding are looking worse than you’d like don’t do anything until you get a power washer cleaning. Remember siding accumulates dirt over years and years and over time it can look very different than when it was first installed.
Conclusion:
I hope these 10 foolproof exterior home maintenance tips have helped you in your DIY projects while allowing you to learn how to avoid costly repairs down the road.
Be sure to comment below if you have other exterior home maintenance tips that you want people to know about.
Don’t forget to check us out on social media.
Here are some other articles that can help you with your DIY projects and save money on home improvement repairs or remodels:
15 Ways To Save Money On Home Insurance