
This post may contain affiliate links. Please read the disclosure for more info.
I enjoy saving money by solving performing routine maintenance and making minor plumbing repairs around my home. For some reason, DIY’ers and homeowners seem to think that waste leaving the home is a mystery, but it isn’t.
Being able to navigate your water supply lines, shutoff valves, and know how waste drains into the sewer line is a surefire way to avoid calling a professional and save money. However, a good rule of thumb is if you are not comfortable with the task don’t make matters worse. Call a professional.
As you review the topics below and follow the simple steps you will be able to troubleshoot and tackle most home plumbing problems and save money!
Jump To:
What are the home plumbing basics every homeowner must know?
Before starting any project make sure you review your home insurance policy to ensure that you are aware which repairs are requiring a licensed professional to complete otherwise you may find a bigger financial burden on your hands.
First, always make yourself familiar with the local plumbing codes.
Second, it is important to first understand how water enters and exits your home. While there are home’s that have a well, cistern, and septic, for this article we are talking about public water and sewer.
Water is supplied to the home through a city’s main water supply line from the street to a basement or crawlspace. This is where you will find your water meter, the main shut off valve and various supply lines that carry water throughout the home to various water sources.
The home waste is made up of two parts: the drain pipe and the vent pipe. The drain pipe carries waste away from the home to a city sewer and the vent pipe allows air to enter the system to allow the waste to drain freely.
Finally, a note on gas lines: This is an area that I would highly recommend you do call in a professional. Gas is not something you want to mess around with.
A home’s plumbing system is a bit more complex so let’s tackle a few more topics below. Please keep reading to learn how you can save money by doing it yourself for some common plumbing problems.
How to locate the water shut off valve?
Your home has many water shutoff valves and knowing and testing them can mean the difference between cleaning up a puddle of water and having to deal with thousands of dollars in damage.

Most appliances that use water have shut off valves near them and are easily visible. Others are hidden behind fixtures, cabinets, access panels, and some may even be outside.
It is most important to know where your main water shutoff valve is located and test it to ensure you can operate it.
Most main shutoff valves are located in a few different areas based on what region you live in. If you live in a warmer climate the main shut off valve is usually located outside, underground where there is a removable cover. In colder climates, the main shutoff is usually in a garage, basement or crawlspace.
Most main shutoff valves will require a wrench or tool to operate.
Tip: It is a good idea to shut off the main water valve before heading on a long vacation to avoid any possible pipe rupture or water damage.
How does a home’s Drain, Waste, Vent (DWV) system work?
The drain, waste, vent system (DWV) carries water and waste out of and away from your home, allowing air in and preventing harmful gases from entering the home.
A home’s DWV consists of the main stack which is a pipe 3 or 4 inches in diameter and extends up through the roof. Waste and water that travels down the stake goes to the main drain that ultimately leads to the city sewer or a septic system.
A drain pipe is installed on a gradual downgrade of a 1/4″ per foot to allow water and waste to drain through it easily.
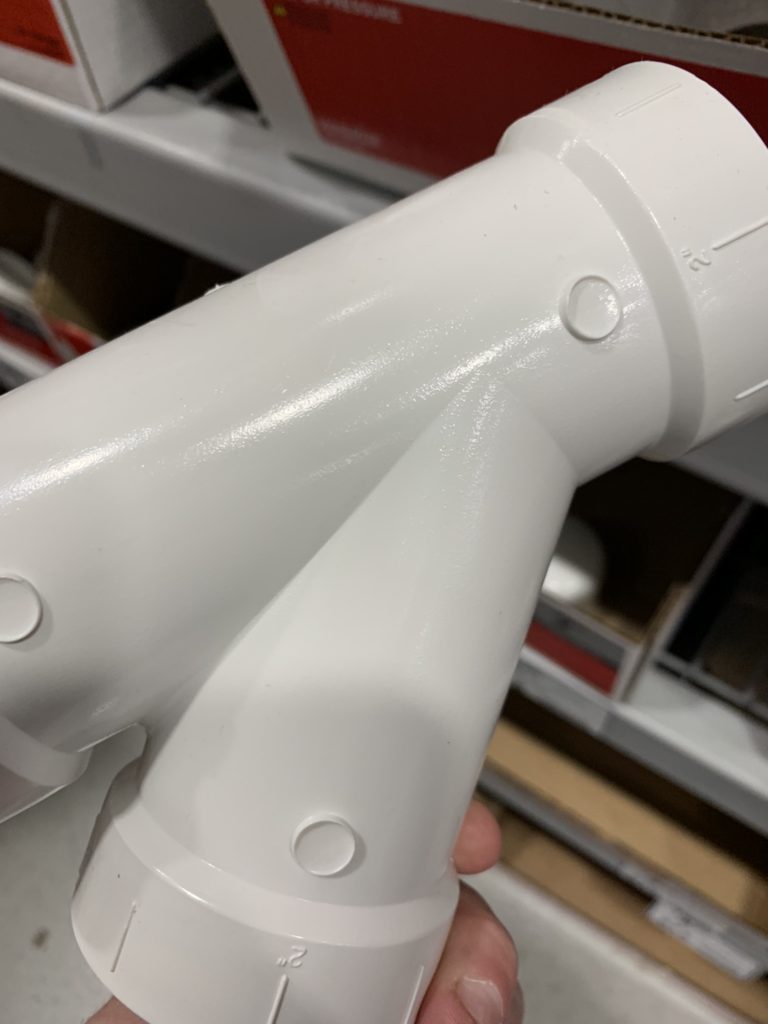
For turns most codes require sweeps rather than abrupt turns that could clog easier.
Most drain pipes have cleanout plugs which allow sections of pipe to be accessible for cleaning or “snaking” if a clog should occur.
Vent pipes which can be the most important aspect of a home’s DWV system allow air to escape, avoiding a vacuum, which will allow waste and water to leave the home freely.
A DWV pipe vent will also allow harmful gases to escape the home.
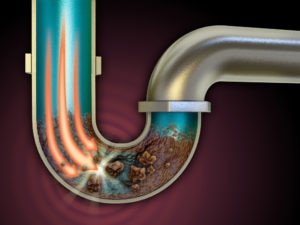
If you see a toilet, tub or sink “gurgling” or draining slow it can be a clog in a waste pipe or the vent. If simple snaking of the pipes does not work, you may need to call a professional plumber who can perform high-pressure water jetting to remove any build-up in the pipes or debris.
What is an Air admittance valve or AAV?

An air admittance valve or AAV uses the vacuum created by flowing water that will open a valve that lets air into the drain which will allow the waste to flow smoothly. The valve will close immediately and prevent the entry of sewer gases into the home. An AAV will reduce the number of vent pipes needed, but not all local codes will allow for the use of an AAV.
Be sure to check local plumbing codes before installing an AAV.
How to unclog a toilet?
A toilet clog happens when toilet paper or possibly something else gets clogged in the pipe sending waste down the drain pipe.
Using a plunger, you can remove this clog and continue using the toilet normally.
A word of caution: Wear gloves, eye protection and a mask if you have it. While it is not necessary it is likely that a plunger will cause water to splash up and you do not want that in your mouth, on your hands or in your eyes!
While the toilet is clogged refrain from flushing if the toilet is clogged to prevent overflow.
Place the plunger over the hole in the bottom of the toilet bowl, pushing it back and forth to push air into the pipe dislodging the clog.
Continue doing this without removing the plunger until the water flows freely out of the bowl.
If you do this several times it can be the siphon is clogged much worse and may require a tougher tool like a toilet auger (a.k.a toilet snake) than a plunger. This is a metal tube and a crank to allow you to push the tube into the pipe to break through any obstacles in the toilet. Shut off the water at this stage.
Place the toilet auger into the bowl and work it into the waste pipe until you feel resistance.
Once you feel resistance you most likely encountered the source of the clog. At this point keep pushing forward to break through the clog.
Once the clog is cleared cautiously retrieve the auger since you may be retrieving whatever was clogging the pipe.
At this stage, you can turn the water back on, flush the toilet and enjoy success; until it happens again!
Tip: I would avoid using harmful chemicals on clogged drains. It is much safer and more effective to clear them directly!
How to unclog a drain?
A drain clog is much different than a toilet clog since a drain clog is usually due to hair or something worse than toilet paper.
To begin with, you can use try a plunger to try and remove the clog, however, it is less likely to achieve the desired outcome since, as mentioned before, a drain clog is different than a toilet clog.
A word of caution: Wear gloves, eye protection and a mask. While it is not necessary it is likely that water will splash up and you do not want that in your mouth, on your hands or in your eyes!
While the drain is clogged it is best to shut off the water supply to reduce the possibility of further water in the line and cause an overflow.
A plunger is less likely to resolve the issue. It is best to start with a drain auger, different than a toilet auger since the possible cause is hair in the pipe clogging it up.
To use a drain auger, you will need to remove the sink stopper.
Place the auger into the sink drain and work it into the waste pipe until you feel resistance.
Once you feel resistance you most likely encountered the source of the clog. At this point keep pushing forward to break through the clog.
Once the clog is cleared cautiously retrieve the auger since you may be retrieving whatever was clogging the pipe.
If the auger didn’t work you can try a drain bladder which attaches to a garden hose, is placed in the pipe like the auger and when the water is turned on it will swell inside the walls of the pipe providing a water tight seal and send a jet of water to blow out the clog to clear the pipe of any debris.
At this stage the drain should be clear, and you can turn on the water and rinse the drain pipe to ensure it is working.
Tip: I would avoid using harmful chemicals on clogged drains. It is much safer and more effective to clear them directly!
How to fix a leaky faucet?
The main reason for faucets leaking is due to the cartridge inside the faucet that does not fully close stopping the water from flowing through it. This is due to normal wear and tear and can be easily repaired.

Most big box stores will not carry the different cartridges for your faucet and depending on the age you may need to order it from the manufacturer, internet site or local plumbing store. I would suggest if you have the manual which lists the parts, order it ahead of time, otherwise, you will need to tackle this in a later step.
In a two-handled faucet you will need to replace both cartridges and in a single-handled faucet you will need to replace one cartridge.
Make sure to shut off the water supplying the faucet.
Make sure you block the drain with a cloth or other material so that when you remove small parts you do not lose them!
Find the screw that is holding the handle onto the faucet. It is usually under a plastic cap or near the top of the handle. If you cannot find it check the manual or internet to help locate the screw.
Once you locate the screw, unscrew it and remove the handle.
Once the handle is removed you will see the cartridge; depending on your faucet model or style it can vary.
Once you have the cartridge removed, but couldn’t order it ahead of time, then you will need to find a local plumbing store or check the internet to get the right one ordered.
Once you have the correct cartridge simply install it, replace the handle, turn on the water and you are all set. No more leak!
How to repair a toilet?
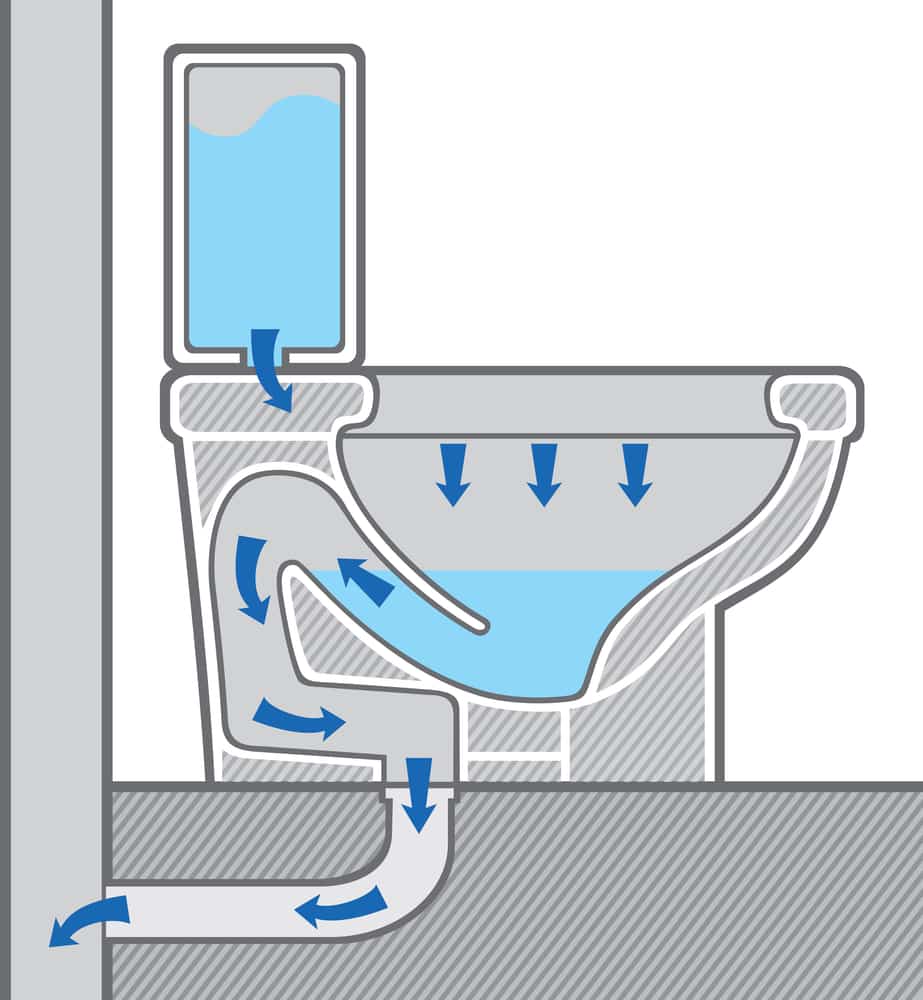
Toilets work by gravity. When you push the handle down a chain pulls up the flapper which is covering the flush valve opening. The water rushes through the flush valve into the toilet bowl. The water from the tank forces water and waste in the bowl through the toilet, trap, and pipe into the main drain. Once the tank is empty of water, the flapper closes, and water fill tank. When the tank is full, the float mechanism on the fill valve turns off the water coming in from the supply line.

This topic is not about a clogged toilet. For a clogged toilet see the earlier topic: How to unclog a toilet.
To likely toilet repair needed is the flapper will not cover the flush valve opening, the float valve is damaged or stuck, the chain came loose, or the refill tube came loose.
For the chain it is a simple fix. Just reattach the chain to the handle.
If the refill tube came loose, you simply reattach it to the overflow tube.
The most common issue is the flapper. If the flapper is damaged due to rotting you can simply turn off the water to the toilet, remove the flapper, buy a new one and install it.
The next common issue is the toilet float or fill valve. If the float is damaged or stuck you can usually tap it causing it to move, adjust it or you may need to replace it.
To replace the float will require a tank removal in most cases.
Shut off the water, flush the toilet to help drain it, further drain the tank, detach the fill valve and remove the nut holding the assembly to the toilet (usually under the tank).
Once you remove the nut holding the assembly to the tank a little water can still spill out which is normal. Put down a bucket or towel to catch the excess water.
Once you have the new valve, install the new valve in the tank, tighten the nut, attach the fill valve and turn back on the water.
Tip: You may need to dial left or right the screw on the top of the valve to adjust the water height.
After the tank fills, flush the toilet and check for any issues.
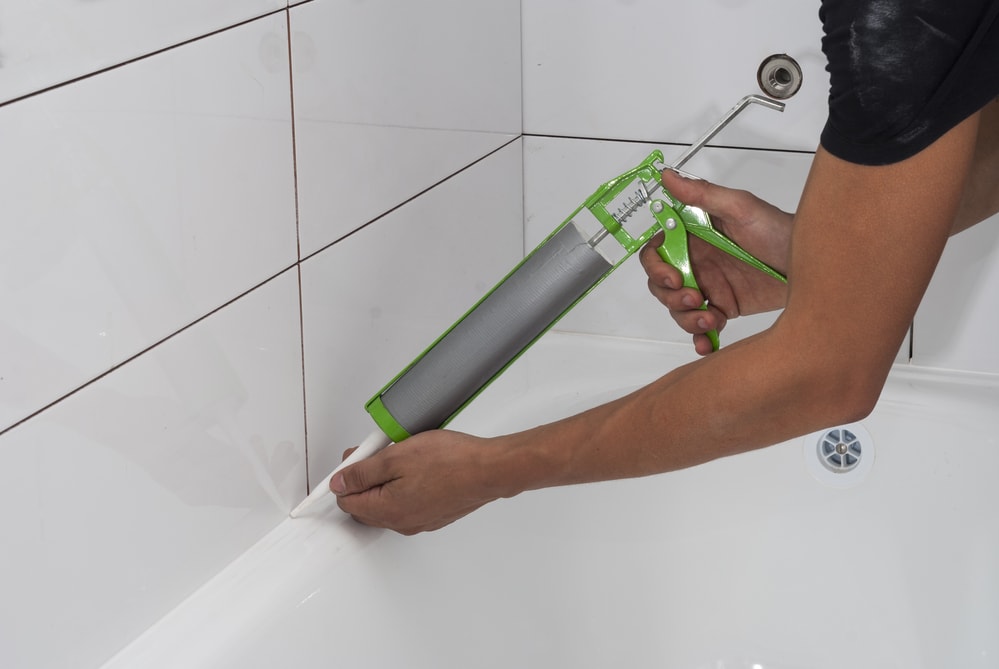
How to update or replace caulking in tubs, showers, and sinks?
You will need a caulking gun, caulk, tape, paper towels, and putty knife.
Using a putty knife or tool of choice remove existing caulk in the tub, shower or sink.
Preparation before new caulk is key! Clean the area using alcohol or a mold/mildew spray to ensure no mold and mildew will be trapped behind the new caulk. Allow to air dry before applying caulk.
I put painter’s tape or masking tape on the lower and wall surface to help get a very clean caulk line.
Once the surface is prepared; get your caulk, caulking gun and cut the nozzle to match the size of the caulk line required.
With the caulking gun at a 90-degree angle press the handle releasing a bead of caulk to fill the gap. Keep moving the gun along the line while applying even pressure.
Once the line is done, go over it with your finger, flattening the bead of caulk into the gap and removing any excess caulk.
Clean the tip, your finger and continue through the rest of the area.
Once all caulking is complete, remove the tape and let the caulk cure based on the tube recommendations.
How to replace a showerhead?
A new showerhead can help reduce the water consumption during a shower and if your existing showerhead is leaking you can be spending money on an expensive water bill that you can’t afford.

Remove the old showerhead by loosening the nut above the showerhead with your hand or a wrench by turning it counter-clockwise.
Clean off the existing threads from any mineral deposits or Teflon tape.
Apply new Teflon tape
Screw the new showerhead on the shower arm clockwise until tight.
Turn the water on and check for leaks.
If there are leaks turn off the water, tight further and repeat if necessary.
If after several tries, remove the showerhead, clean the threads, apply new Teflon tape and repeat.
How to clean out a p-trap?
To remove a p-trap, clean out the area directly underneath the sink and place a bowl, bucket or container to catch the residual water that is always in the p-trap by design.
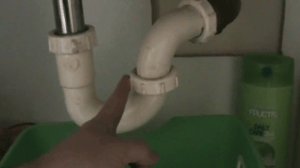
If your p-trap has slip joints, you can loosen them with your hand or a wrench. Once you loosen the slip joints, remove the p-trap and dump out any excess water. If it is very clogged, you can use a coat hanger or toothbrush to help remove debris in the trap.
If your p-trap has no slip joints you will need to use a hacksaw, PVC pipe cutter or reciprocating saw to cut the downpipe and the trap arm.
Once you cut the p-trap away from the sewer lines and downpipe you can remove the excess water and p-trap. If it is very clogged, you can use a coat hanger or toothbrush to help remove debris in the trap.
Now you will need to repair the cut pieces by shortening their lengths and adding a coupling to allow for the re-connection of the p-trap.
Turn on the water and test for leaks.
See article written on What To Do If Something Falls Down The Drain?
Conclusion:
I hope you have learned something that you can leverage for your next home plumbing project.
The items discussed are only a subset of what every homeowner must know when it comes to the basics of home plumbing, but there will be more additions so check back for updates soon.
If you have any other tips or comments please leave them below so others can benefit.
If there are other topics you are interested in discussing or learning about please drop a note below in the comments section.