This post may contain affiliate links. Please read the disclosure for more info.
Like many people, I enjoy saving money, and one way I found I can save money regularly is by solving some common problems, performing routine maintenance, or making minor repairs around my home. One area that I have focused on a lot lately is the basics of home electrical. For many, this may seem like a scary task to tackle but the home electrical system is simple once you understand some of the basics. If you review the list below, follow the simple steps, take the necessary safety precautions, as a homeowner, you will be able to troubleshoot and tackle many basic home electrical challenges, improve your home and save money.
Jump To:
What are the basics of home electrical that every homeowner should know?
Electricity flows from the outside wires into the home’s main panel, through the circuit breakers and throughout the interior of your home where it connects to switches, outlets, fixtures, and appliances. The basics of home electrical are outlined here and broken down into manageable and easily attainable tasks that will give you peace of mind when dealing with these tasks.
These can be broken down into the following:

- Safety is a priority! Be sure to follow these rules at all times.
- Always shut off the power at the breaker in the main panel
- Always use a tester to confirm the power is off
- Always work cautiously when handling wires while using the proper tools, techniques and safety equipment.
- Ensure you follow the codes and regulations for the state or region you are working in.
- How does electricity enter the home?
- Electricity enters your home via wires from power lines or underground power lines.
- These wires made up of a hot and neutral, pass through an electrical meter, enter the home into the main panel that is made of grey metal and usually located on the interior wall where the wires enter the home.
- Once in the panel there are wires that run throughout the home made up of hot (black), neutral (white), and ground (bare copper).
- While newer homes will be wired with a white insulated wire called NM or most widely known as Romex which is a brand name.
- Another type of wire you may come across is called BX which is a metal covered and less common nowadays in residential wiring, but still required is some other wiring situations.
- Whatever they are covered in the main purpose of these sets of wires is to provide electricity to different parts of the home.
- All electrical wiring in the home is made up of a set of wires; hot (usually black) and a neutral (usually white).
- The hot will deliver the electricity from the main panel and breaker to the appliance, fixture or receptacle.
- The neutral will help complete the loop by taking the electricity back to the panel and then to the source (usually the transformer on the high line pole).
- The home also has a ground (bare copper) wire that is usually affixed to a rod outside the home that penetrates the earth at a minimum of 8 feet.
- The ground wire would only carry current in a condition where a failure has occurred.
- Each of the sets of wires leaving the panel and traveling throughout the home will be connected to a circuit breaker.
- The will end in a light, appliance, switch or fixture receptacle.
- In most cases the wires will be attached from outlet to outlet and fixture to fixture based on the wiring schematic the electrician had followed and local, state, regional building codes that must be followed.
You will learn more about the main panel, breakers, and circuits below.
How to locate the main breaker panel and how to label the breakers properly?
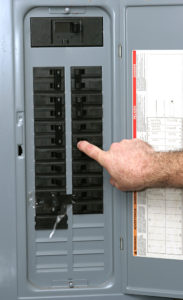
Almost every electrical situation will call for the electricity to some portion of the home or specific appliance to be shut off. Knowing where the main breaker panel is in a home is very important.
The main breaker panel is usually a gray metal box located near where the electrical power supply is entering the home. Don’t be worried about opening the main panel door since the dangerous components are housed behind a steel cover.
The main panel is made up of many breakers that act as a safety switch to control the flow of electricity throughout your home. If the breaker receives too much current than the circuit was designed for it will shut off the flow of electricity and snap away from the “on” position.
A breaker in this state is known as a “tripped” or “blown” breaker and usually has a red or orange indicator. To reset the breaker simply push the breaker from the tripped position toward the “off” position then toward the “on” position. When doing this, you may hear items turn on or beep which is an indication of them receiving electricity again and perfectly normal.
Additionally, you want to know that each breaker in the panel is properly labeled and what it controls. You may need to test each breaker by moving it to the “off” position and confirm what it shut the power off too. Update the label if needed. Move it back to the “on” position. Doing this will also save you time on your next project when you need to shut off the power by avoiding the constant “is it off” yelling scenario.
Safety: Never touch a breaker with both hands, always wear rubber-soled shoes, ensure you are not in a wet area to ensure you do not receive a shock from a breaker.
How to use an electrical tester to test for voltage?
Always practice safe electrical work by ensuring proper safety precautions are followed. Do not perform electrical work without a voltage tester. It can save your life!
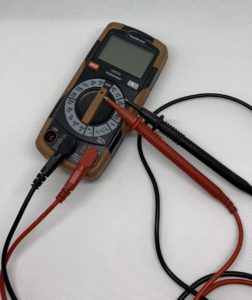
If you shut off the power keep an NCVT handy to test while you are working since you never know if electricity may still be present with a breaker off. Read more on this topic here: Can you still get shocked if the breaker is off?
There are several kinds of voltage testers or multi-meters; those that are simple like a non-contact voltage tester (NCVT) or a more complex one that has clips and probes with several settings to help with amperage, voltage and ohm readings.
You can use a voltage tester to test for voltage, ground and verifying polarity.
Voltage testers will vary slightly but generally light up, beep or flash when it encounters electricity.
If you are using a non-contact voltage tester, the process is simple. If the power is on and you are testing a wire, outlet or switch you can simply put the NCVT near it, and it will light up, beep or flash.
If you are using a voltage tester with probes or clips, you want to ensure you are safer than when using an NCVT tester.
If you are testing wires or switches, you will need to shut off the power, remove the covers and expose the receptacle and wires. Then you can turn on the power to test the wires.
To use the probes, you insert the metal probe into the slits of an outlet or touch the insulation of the wires. If electricity is present the tester will light up, beep or flash.
How to reset and test a Ground fault circuit interrupter or GFCI or GFI?
A GFCI is a ground fault circuit interrupter or also called GFI. A GFI acts like a circuit breaker in the main panel of your home. By code, you often see GFI’s near water in areas like kitchens, bathrooms, outdoors and where you tend to have appliances plugged in that draw large amounts of electricity like hairdryers, toaster ovens, etc.. that can cause the wires to get too hot which will cause the GFI to “trip.” When the GFI “trips” you will need to reset it.
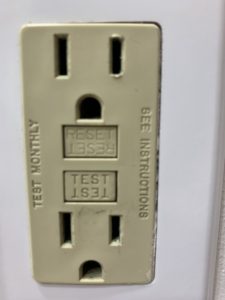
To reset the GFI push the reset button (seen in the pic) all the way in and you will hear a click. Since it’s possible that a GFI trips for no reason you will need to reset it. If a GFI trips while using an appliance and if after resetting it trips again you may need to check the appliance.
You will also see a button on the GFI called “TEST.” You should test your GFI regularly. To test the GFI, you press the test button in, and the GFI should trip right away. If the GFI does not trip right away, it could be faulty, and you should look to replace the GFI.
How to replace an electrical outlet?
This process can also be applied to how to replace a GFI outlet.
To replace an outlet, you want to ensure the power is off by shutting off the breaker and using a voltage tester to ensure there is no electricity present.
Remove the faceplate by removing the screws holding it on the wall.
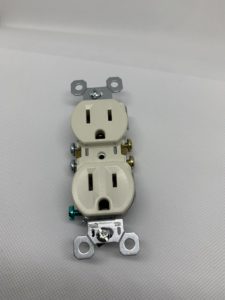
Use a tester again to ensure no electricity is present and unscrew the outlet from the junction box.
Take note of how it is wired. Take a picture with your phone if needed.
Unscrew the wires from the outlet.
Install the new outlet by attaching the wires in the same way they were attached to the prior outlet using wire nuts and electrical tape. I always use electrical tape, and I believe it is a cheap but effective precaution and highly recommend it.
Tip: I also wrap electrical tape around the screws to help prevent any shocks.
Gently push the wires back into the junction box and screw the outlet to the junction box.
Replace the faceplate.
Turn the power back on and test the outlet.
How to replace a light switch?
There are several kinds of light switches; single-pole, 3-way, 4-way, motion-sensors, and dimmers.
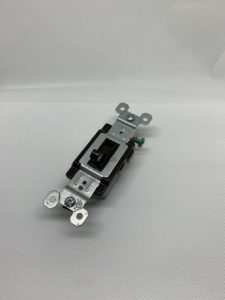
Ensure the power is off by shutting off the power at the main panel.
Remove the faceplate by removing the screws holding it on the wall.
Use a tester again to ensure no electricity is present and unscrew the light switch from the junction box.
Take note of how it is wired. Take a picture with your phone if needed. A single-pole is wired differently than a 3-way, 4-way, and a dimmer switch. It is very important to understand what type of switch you are replacing.
Unscrew the wires from the switch.
Install the new light switch by attaching the wires in the same way they were attached to the prior switch using wire nuts and electrical tape. I always use electrical tape, and I believe it is a cheap but effective precaution and highly recommend it.
Tip: I also wrap electrical tape around the screws to help prevent any shocks.
Gently push the wires back into the junction box and screw the light switch to the junction box.
Replace the faceplate.
Turn the power back on and test the light switch.
How to replace a light fixture?
Ensure the power is off by shutting off the fixture at the main panel.
Test with a voltage tester to ensure there is no electricity present.
Start by removing the old fixture from the junction box and take note of the way it is wired. Take a picture with your phone if needed.
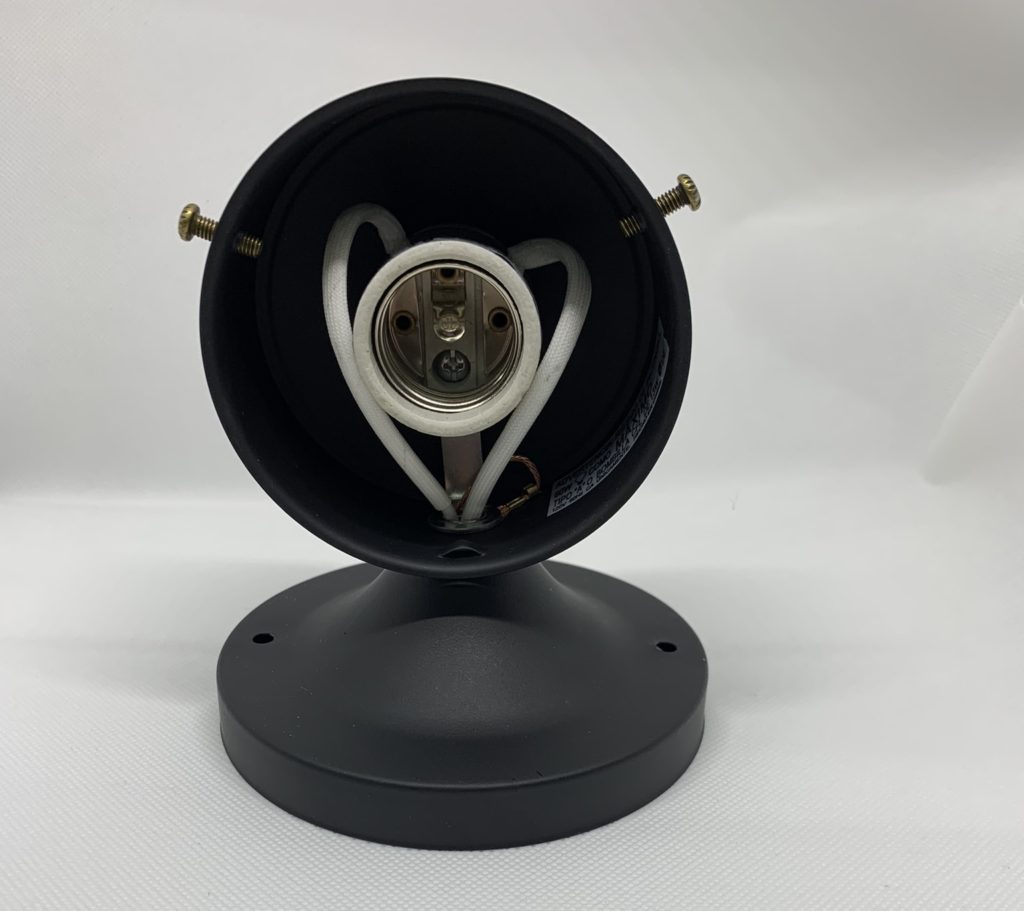
When installing a light fixture, you need to be cautious not to drop the fixture. If you are installing a ceiling fixture, it might be best to have someone help you hold the fixture.
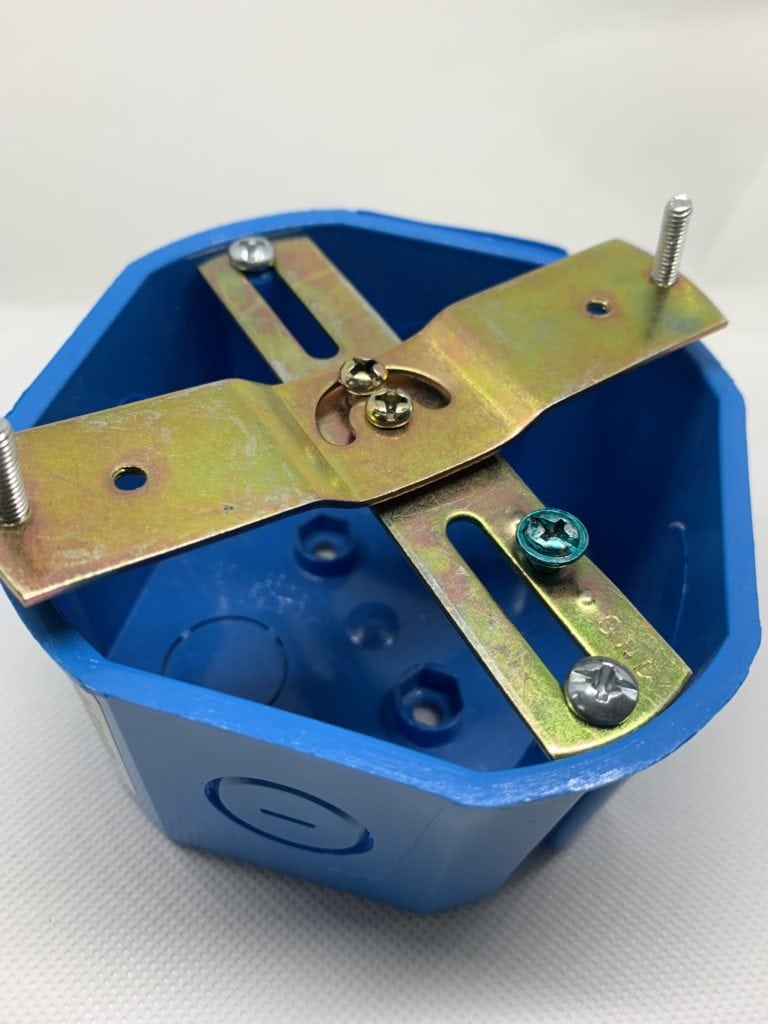
One tip that I like to use is that each junction box has a metal light-fixture hanging strip which has a ground screw (green) on it. I attach the light fixtures grounding wire to this green grounding screw which (if it’s not heavy) can allow the fixture to hang from that copper wire and screw preventing you from dropping and damaging the light fixture.
You will want to splice the new fixture wires to the existing wires in the junction box using wire nuts and electrical tape. I always use electrical tape, and I believe it is a cheap but effective precaution and highly recommend it.
Gently push the wires back into the junction box and screw the light fixture to the junction box.
Install the lightbulb and if applicable add the light covers.
Turn the power back on and test the new fixture.
How to replace a lightbulb?
This is a simple process, but you want to ensure the light switch is in the off position for safety.
Remove the existing bulb by turning it counter-clockwise. Discard the bulb carefully and properly.
Install a new bulb by slowly inserting it into the base of the fixture and turning clockwise allowing the threads to catch properly.
Hand-tighten only. Do not overtighten.
Turn on the switch and test the new bulb.
- Note on different kinds of light bulbs: Incandescent, Fluorescent, Compact Fluorescent, Halogen and LED.
- Incandescent lights are most widely known and use a filament that heats up. These are being phased out in the United States as of 2014.
- Fluorescent light bulbs pass a current through a gas-filled tube.
- Compact Fluorescent bulbs are smaller and more efficient than the Fluorescent bulbs.
- Halogen is probably the hottest bulbs out and like an incandescent bulb but produces more efficient light.
- LED stands for light-emitting diode, last a long time and are the most energy efficient bulb at the writing of this article. These bulbs are gaining in popularity over the last few years.
How to remove the base of a broken light bulb?
There are a few methods to remove the base of a broken light bulb from a fixture. Before dealing with the broken light bulb, ensure the power to the fixture is off. You can do this by turning off the breaker to the light at the main panel. Use a voltage tester to ensure there is no electricity present before starting.
When sure there is no power to the fixture you can begin removing the broken bulb base. To do this, you can use an eraser, a sponge, or other material that will allow you to push it into the base of the broken bulb and turn it counter-clockwise to remove it.
Once it is removed, replace the bulb and turn the power back on.
How to bypass the garage door opener when the power is out?
If you find yourself in a situation where the garage opener is not operating or has lost power, you may still need to open the door for whatever reason.
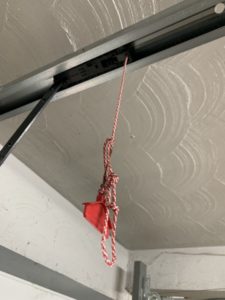
To achieve this, you want to pull the emergency disconnect cord, the red handle hanging near the garage center rail, which will disconnect the door to the drive mechanism, allowing you to open the door manually.
Be careful as the door will be heavy and can fall back down.
You may want to get someone to help you lift the door.
Conclusion:
I hope you have learned something that you can leverage for your next home electrical project.
The items discussed are only a subset of what every homeowner must know when it comes to the basics of home electrical, but there will be more additions so check back for updates.
If you have any other tips or comments please leave them below so others can benefit.
If there are other topics you are interested in discussing or learning about please drop a note below in the comments section.

