This post may contain affiliate links. Please read the disclosure for more info.
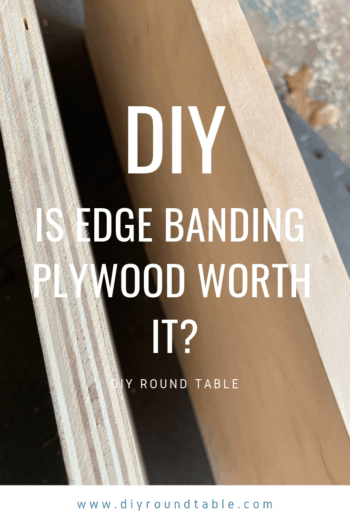
I have built many wooden box frames over the years using plywood for various uses like storage, drawers, a workbench, cabinets, bases and more. Plywood has many advantages when being used in projects and is a durable, inexpensive material that unlike other woods will not warp while having superb strength. When using plywood for my projects I always use edge banding so that it hides the unfinished rough plywood edges and gives it a professional finished look.
Is putting edge banding on plywood worth it? Yes, Absolutely!
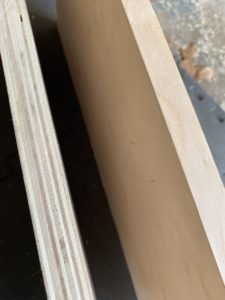
Firstly, putting edge banding on plywood where it will be visible is well worth it. Let’s face it – when it comes to building shelves, cabinets, a box of any kind it is hard to beat the plywood. However, nothing ruins the excitement of finishing a project only to have the ugly plywood edges ruining the moment. That is where edge banding comes in!
Next, by putting an edge banding on the unfinished edge of the plywood, you can make any piece of plywood look like a solid board! The visual benefits and finished look of edge banding far outweigh the time and material that goes into completing the task.
Finally, adding edge banding to plywood projects has been shown to increase the strength of the boards.
If your project calls for using plywood and the edges will not be hidden by rails, stiles or a door then I would advise you to finish the edges with edge banding and trim it with an edge band trimmer tool.
At this point, you may be wondering what edge banding is, how difficult edge banding is to install, is it sturdy and what the costs may be. I will cover those items a bit later in the post.
Jump To:
What makes edge banding worth the it?
I consider edge banding to be the plastic surgery that the ugly edges of plywood require in order to be part of the beautiful wood projects we are creating.
As said earlier when it comes to building projects like cabinets or shelves there is no other solution that offers the seamless look and consistency that edge banding does. A plywood edge that is finished to match the wood grain, finish and color gives any project a professional appearance that shows the pride you put into the finished project.
If you spend time sanding, staining, finishing the faces of the wood on your projects only to have the unfinished plywood edge ruin the overall aesthetics you are not allowing your project to reach its full potential. Some people make their own edge banding, but commercially made edge banding is easier to work with, faster to install, and better-looking than the self-made edging to hide the unsightly plywood edge.
Commercial edge banding requires no clamping and is less noticeable than solid wood strips that are thicker and more obvious than edge banding. Edge banding can even be applied to the curved edges of wood projects.
Edge banding is very durable and will last a long time if it is applied correctly.
Edge banding is sold in pre-glued, glue-less and even peel and stick rolls! If you run into issues with the edge banding, you can always remove it and reapply new edge banding.
In the beginning, edge banding may seem like a daunting task, but after you go through the process several times it will become very easy.
After you complete the project, look at the profile edges of the wood and see how edge banding brings it all together you will get the sense of pride that comes along with going the extra mile and doing it right!
Finally, don’t forget you don’t have to match the appearance of the rest of the project since edge banding comes in various materials, colors, sizes including plastics and metals!
The style and finishes are only limited by your imagination.
What is edge banding?
Edge banding is both a material and a process that has been around for many years. Ancient Egyptians used the art of veneering on their Sarcophagi and furniture.
Today the edge banding material is a thin material made from a wide variety of sources, but the most popular are PVC and wood veneer. The edge banding process refers to using the edge banding material to dress up the unsightly ends of plywood to match finish product and protect the inner layers of the plywood from water, warping and more.
Edge banding comes in many sizes, colors, finishes to match the material used in the project.
Edge banding can be glued or ironed on to the edge of a piece of plywood and trimmed with an edge band trimmer tool.
Edge banding comes in various wood species to resemble most hardwoods including birch, oak, red oak, white oak, mahogany, and cherry. Edge banding also comes in various colors like white, tan, black. Edge banding comes in various widths like 13/16ths and in normal lengths like 8, 50 and 250 feet.
How hard is it to apply edge banding?
- What you will need:
- To apply edge banding you will need the edge banding of your width, color, and length as well as a tool to trim the edge banding, sandpaper or sanding block 120 grit and a normal iron that you would use for clothing.
- Start with an edge of the plywood and cut a piece of edge banding about ½” longer than the edge of the wood.
- Center the edge banding on the edge of the plywood and with the hot iron apply heat to the edge band while holding it in place.
- While keeping it centered and apply pressure run the iron down the edge of the plywood edge no more than 6 inches at a time until you reach the end. Be careful not to hold the iron in one place too long and burn the wood or melt the edge banding.
- Using a flat edge press firmly down on the edge banding to ensure proper adhesion. I use the back of a flat wide chisel to apply pressure when edge banding. Since the edge banding has a relatively thick layer of adhesive be cautious not to press too hard causing the adhesive to compress too thin and lose its effectiveness.
- After the adhesive has cooled for a couple of minutes trim away the overlap of edge banding with a sharp knife, chisel or my preferred method – an edge banding trimmer tool.
- Once you have trimmed all the edges use a coarse piece of sandpaper or sanding block to soften the edges.
- You can choose to leave the edge banding unfinished or after 24 hours you can paint or stain the edge banding to match the project.
By spending about 5 mins per side to put on edge banding you can take your project from Good to Great!
See the video here:
What does edge banding cost?
Edge banding is very inexpensive. Depending on the width, length and finish you choose prices can vary, but you can purchase 250 ft of wood veneer that you iron on for about $25.00. The edge banding trimming tool is under $10 (depending on model) and is very handy for making clean edge cuts on the edge band.
Here are some examples of edge banding prices based on width and length:
| Width – Inches | Length – Feet | Price – USD |
| 13/16″ | 250 ft | $24.99 |
| 2″ | 8 ft | $5.98 |
| 12″ | 4 ft | $19.98 |
As you can see edge banding can be used for many projects and is cheaper than a few options we will discuss below.
Are there alternative options to using edge banding for plywood?
Yes, there are alternatives to edge banding, but none that I have seen that stand the test of moisture, daily use and overall visual appearance like edge banding.
Alternatives include:
- using wood filler to smooth out the edge, sanding and then painting the edge.
- use screen molding or “nosing” which places a thin piece of wood you cut then glue and nail to the edge of the plywood. Apply nail filler and sand it smooth to hide the edge.
I find these alternatives to be far inferior to the edge banding solution while being more costly and time consuming.
Can I remove old edge banding and reapply a new edge band?
You can remove old edge banding by applying heat from an iron while running a putty knife under a corner to start to lift the edge banding off the material. After you have removed all the edge banding you can use sand paper or a sanding block to smooth out any rough spots on the edge of the material. Once you have the edge cleaned up you can follow the steps above to reapply a new edge band and give the project a revitalized look.